Jabra Speak 710
User Manual
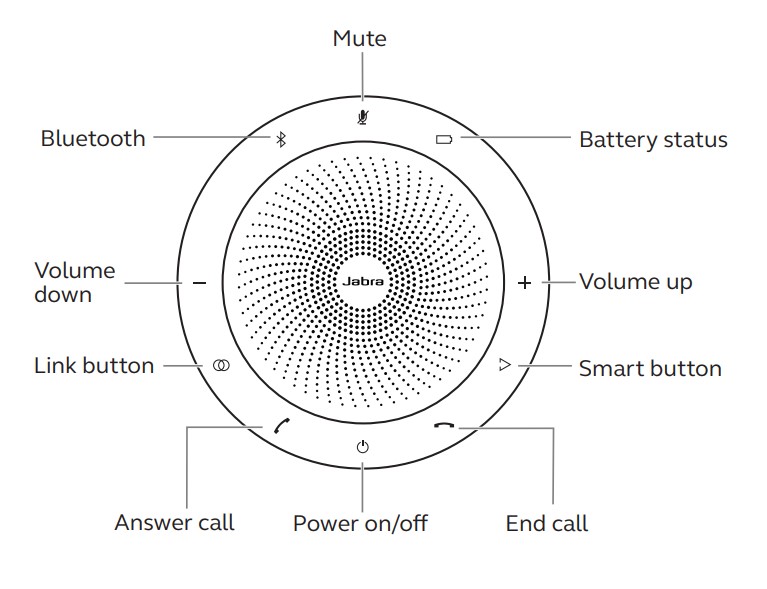
Speaker and microphone: 360-degree sound pick-up allowing attendees to be heard from all angles
- Use one or pair two together for more coverage.
- Wireless with 100’ range (with the small USB dongle)
- Bluetooth for smartphones/tablets (simply go to your phone/tablet Bluetooth settings and connect to Jabra 710)
- Fold out the stand to be upright for optimized music experience or fold it down flat for enhanced group conference calls and collaboration
Use:
Hold down the power button for a few seconds to turn on/off.
Volume buttons -/+ are on opposite sides of each other.
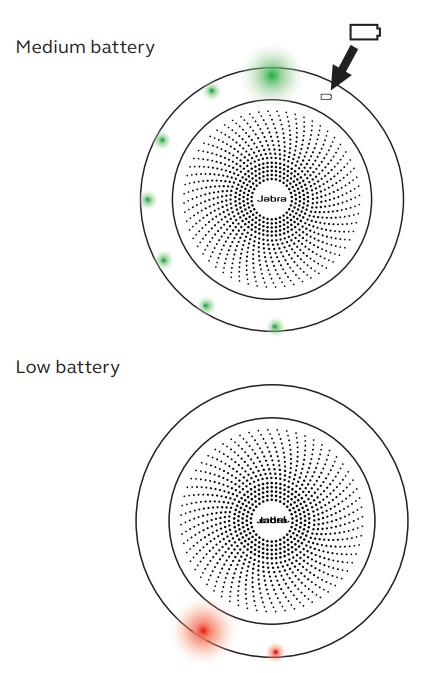
Battery Status:
To view the current battery status, press the battery icon. The LEDs around the edge of the Jabra Speaker 710 will light up to indicate the current battery status.
15 hours battery life – 3 hours to fully charge
Pairing:
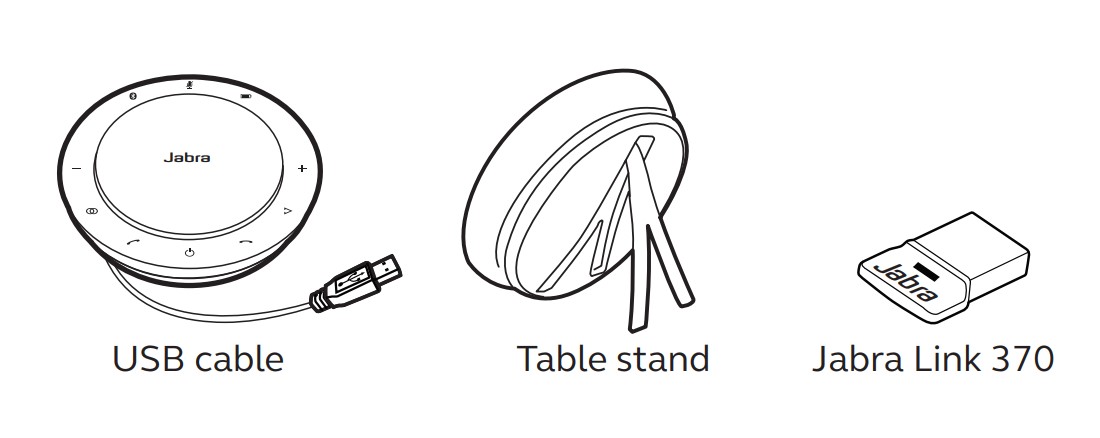
Only one USB has to be plugged into the computer – doesn’t matter which one.
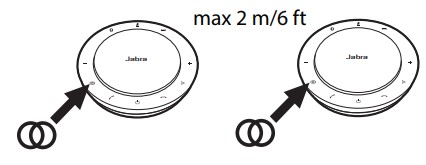
To link the Jabra’s, place within 6’ of each other. Press the ‘Link’ button (circle’s icon). The Jabra’s will state ‘Linked’ when completed.
Place anywhere within 100 feet of the USB/computer. They do not have to be within 6’ of each other except for linking.
Using Jabra’s with Zoom:
Connect one Jabra USB to the computer. Pair the Jabra’s together (if wanted).
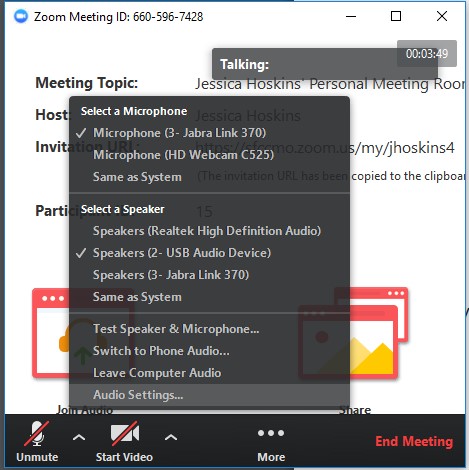
Open your Zoom meeting. At the bottom left, click the arrow besides the microphone icon marked ‘Unmute/mute’.
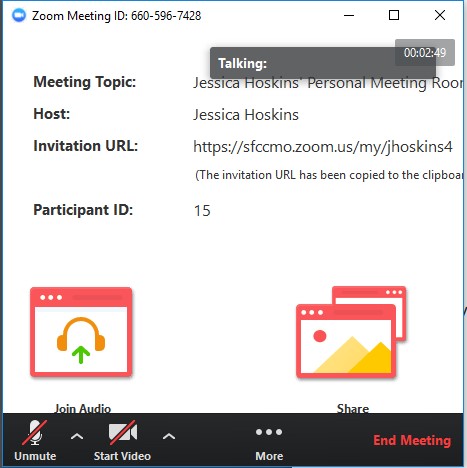
Under the ‘Select a Microphone’, choose ‘Jabra link 370’. (orange box)
If you are in a classroom, you may want to use the ceiling speakers instead of the Jabra speakers for better coverage.
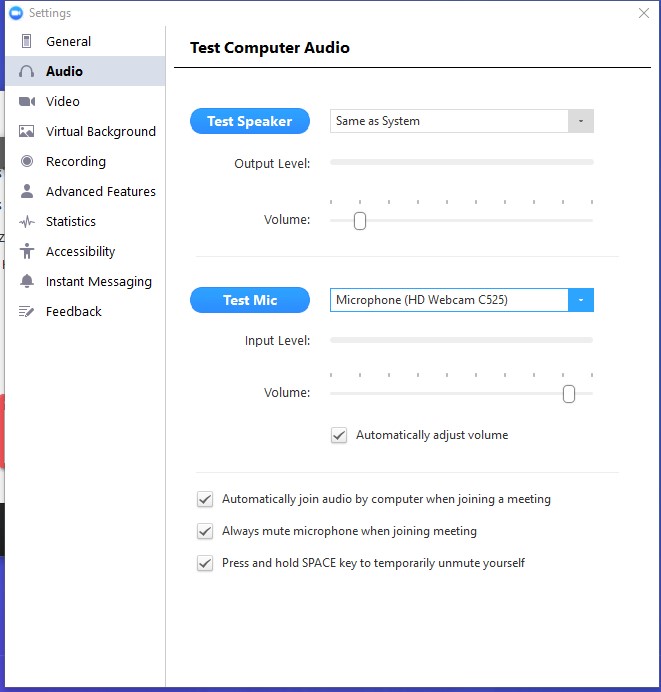
If you are not sure which one is which, go to ‘Audio Settings’ (circled in red).
Click ‘Test Speakers’ and/or ‘Test Mic’ to make sure the correct equipment is selected. (Microphones should be Jabra).
If issues persist, try the other USB dongle or restart the computer. Or restart the steps from the very start making sure to not miss any steps.
Central Help Desk 24/7
(866) 295-3070
Classroom Audio-Video
Below are the steps in starting the AV equipment in the classrooms. Before we tackle these steps, there are a few housekeeping tasks that are needed to make sure each classroom continues to run smoothly.
- Please do not turn off any equipment in the desk nor unplug any equipment from the desk including the PC. The control panel should be used to turn equipment on and off.
- Before leaving the classroom, please log off the PC but keep the PC on. This allows for updates to occur over night. Updates will not occur if any one person remains logged on. If at the end of the day, you can restart the PC which will log off anyone who has not logged off.
- When completed using the classroom, please turn the equipment off using the red power button on the control panel; the button is located at the top right or in the main screen as shown below in step 2 below.
- Please contact 866-295-3070 as soon as possible if you notice something broken or not working correctly.
STEP 1
Classroom AV equipment is turned on by selecting the “On” button on the homepage of the control panel located on the desk. If no image displays after the equipment is on, check the PC to make sure it is on; PCs should remain on but logged off after using.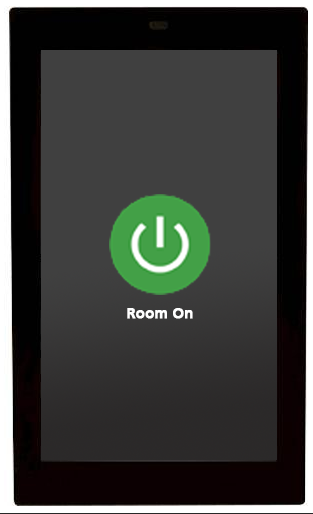
STEP 2
Once the equipment is on, you can select various sources including the camera, desktop and laptop to display on the screen or interactive panel. These features will be added as the rooms are completed. Use the red power button option on the control panel to turn the room off once class is completed.
